
Drawing Progress - Horses - All done!
I'm done! The horses turned out pretty cool. I like them and hope that the person receiving it for Christmas is going to LOVE it! I never want to do anything else...I really enjoy this! All I have to do is spray it with a final fixative and deliver it!


Drawing Progress - Horses
I have been promising to update clients on my drawing progress...and I've let up a little...only because of the holidays and art shows. But, enough with the excuses...
When a client asked me to draw horses for her, (as a Christmas gift to her daughter...one horse has passed away and the other she has now...both very special to her), I was really thrilled. Horses are one of the most beautiful creatures that God ever designed. And drawing them is one of my favorite things to do.
As I began to draw the first horse, Ned, my intention was to use tinted charcoal. I love the look of it...it's very subtle. But I found that nothing but trouble was in store for me. The tinted charcoal only comes in wooden pencil form. But because charcoal is so fragile and crumbly...well, as you can probably guess, each time I went to sharpen them the lead just busted up. The result was a red face and scowling eyes. (not the drawing...ME). As a result of this struggle I now own many different kinds of pencil sharpeners...electric, hand crank, little ones, big ones, expensive ones and cheap ones...so if you need to borrow one I'm your gal! I also tried my hand at whittling, which my brother taught me how to do one night sitting by a bon-fire...but, nope, that didn't work either!
I struggled for days...until I realized that the tinted charcoal was really similar to my pastels...which are not pencils, but the hard chalk type that can be sharpened by using sand paper. Or if you are blessed to have a relative in the dry-wall business he can hook you up with some dry-wall screen. I have a small square of it which I wrapped around the bottom part of a pastel box. I use the top of the box to hold it onto it. Then I can sharpen the pastels while the "dust" goes into the box. When I'm done I just turn the top back around to close the box until next time. (Just a little hint for you pastel artists and artists to be).

Okay, so I started using the pastels...and yay! I got my "art mojo" back. It's that thing that just comes over me and says...okay...yes...this is looking how I wanted. No more struggling. Whew! So I have the first horse done (mostly)...and then I have a second horse in a similar pose (jumping) for the other side of the page. I am going to tweek this first horse after I've started the other, but for the most part he's finished.
The picture that the client provided is very sharp and clear, but really small. So here's another tip...scan the picture and enlarge it. (You can't tell here, but the enlargement is blurry when it comes to details). So I bought a really great magnifying glass that hangs around my neck. When I want to see detail more easily I look at the original and it works nicely!
I will be drawing the other horse starting tomorrow...so check back again soon!!!
Pastels on a brown mat board 20"x24"
When a client asked me to draw horses for her, (as a Christmas gift to her daughter...one horse has passed away and the other she has now...both very special to her), I was really thrilled. Horses are one of the most beautiful creatures that God ever designed. And drawing them is one of my favorite things to do.
As I began to draw the first horse, Ned, my intention was to use tinted charcoal. I love the look of it...it's very subtle. But I found that nothing but trouble was in store for me. The tinted charcoal only comes in wooden pencil form. But because charcoal is so fragile and crumbly...well, as you can probably guess, each time I went to sharpen them the lead just busted up. The result was a red face and scowling eyes. (not the drawing...ME). As a result of this struggle I now own many different kinds of pencil sharpeners...electric, hand crank, little ones, big ones, expensive ones and cheap ones...so if you need to borrow one I'm your gal! I also tried my hand at whittling, which my brother taught me how to do one night sitting by a bon-fire...but, nope, that didn't work either!
I struggled for days...until I realized that the tinted charcoal was really similar to my pastels...which are not pencils, but the hard chalk type that can be sharpened by using sand paper. Or if you are blessed to have a relative in the dry-wall business he can hook you up with some dry-wall screen. I have a small square of it which I wrapped around the bottom part of a pastel box. I use the top of the box to hold it onto it. Then I can sharpen the pastels while the "dust" goes into the box. When I'm done I just turn the top back around to close the box until next time. (Just a little hint for you pastel artists and artists to be).

The picture that the client provided is very sharp and clear, but really small. So here's another tip...scan the picture and enlarge it. (You can't tell here, but the enlargement is blurry when it comes to details). So I bought a really great magnifying glass that hangs around my neck. When I want to see detail more easily I look at the original and it works nicely!
I will be drawing the other horse starting tomorrow...so check back again soon!!!
Pastels on a brown mat board 20"x24"
Drawing Progress-Sweet Little Girls - Final

I hope that the client loves what I did. I enjoyed drawing these beautiful girls and hope to get many more clients who have other little ones for me to draw!
More portraits to come starting next week...Whew!!! I will actually be drawing horses! So check back after Thanksgiving! Happy Holidays!
Close Ups:


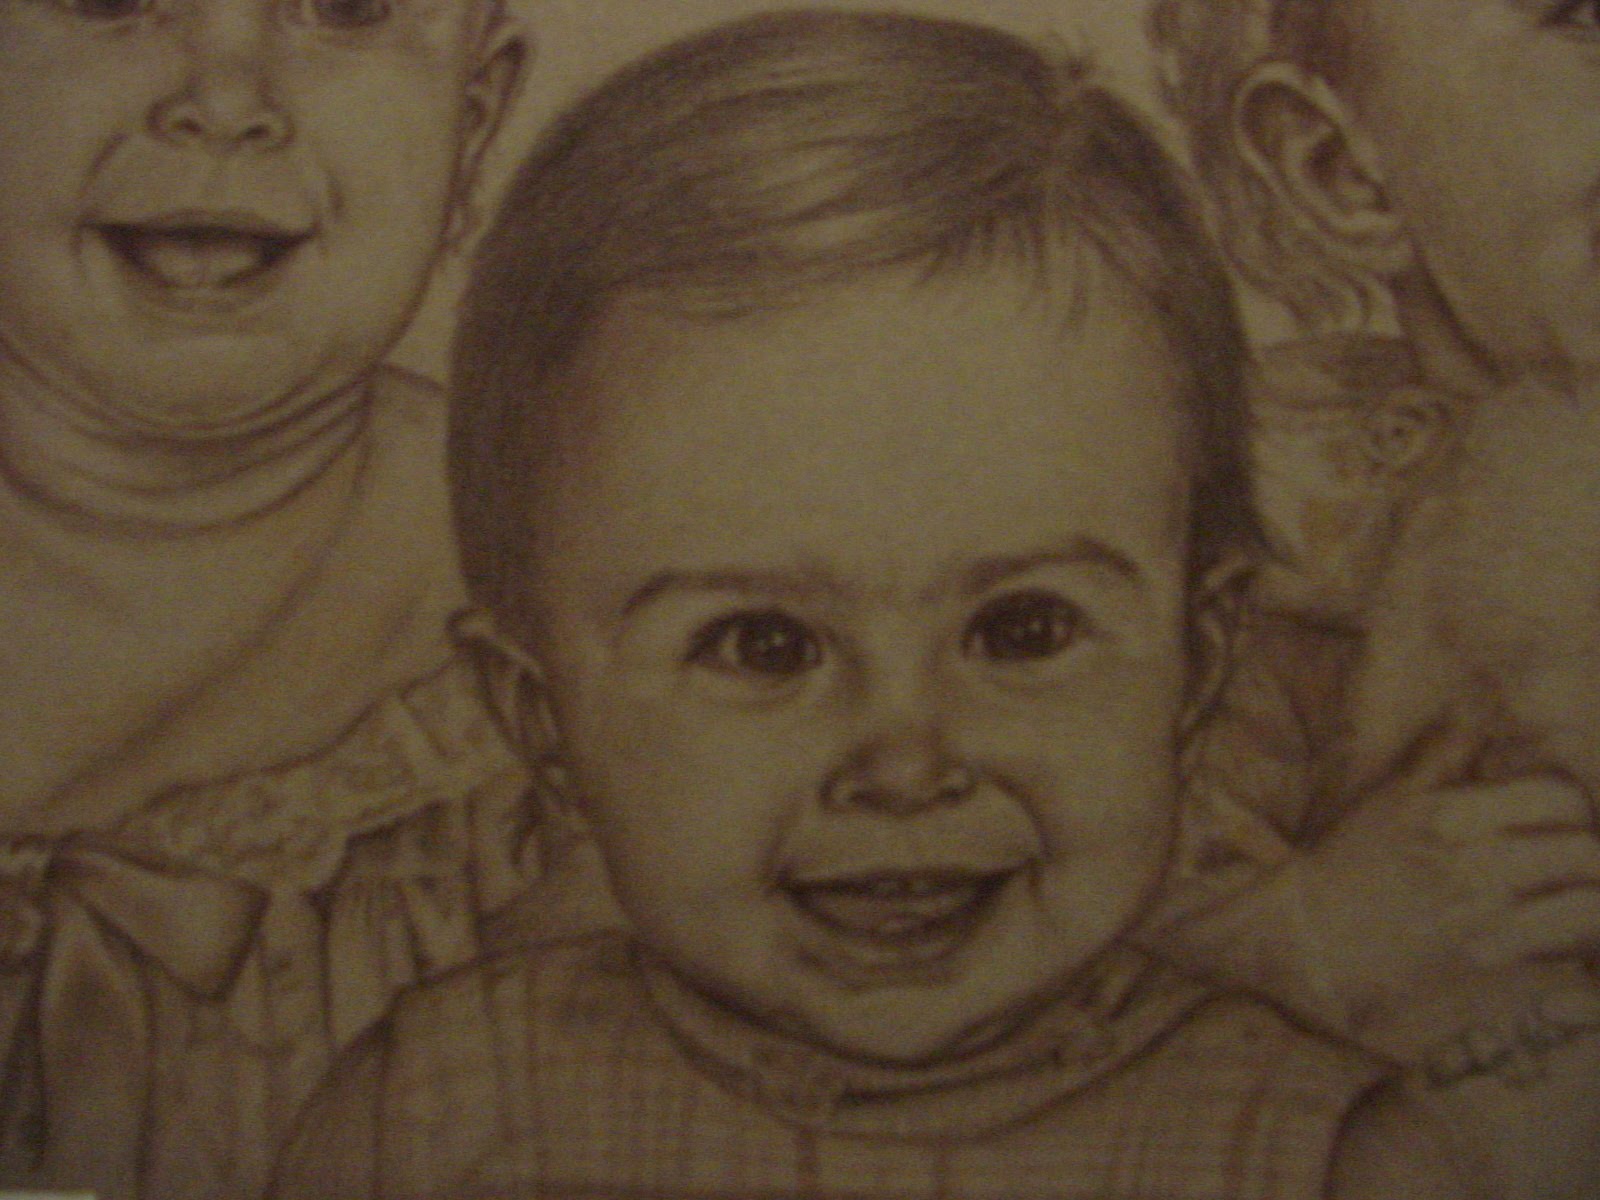
Drawing Progress-Sweet Little Girls - #3

I will be tweaking her eyes to make them a little softer and softening the shadows in her face. she is drawn a little darker to bring her forward in the portrait. Doesn't it give the illusion of her sitting in front of her siblings?(Giving the portrait depth).
I will be finishing this portrait by the weekend. Hope you come back to see the final result!
(btw...please excuse the photography, I am having a little trouble with my camera...thanks!)
Drawing Progress-Sweet Little Girls - #2

Okay, so far I have nearly completed Sister #1. She is a beautiful little girl and bringing her face to life using my Derwent Colour Soft (Brown Earth) pencil was a blast. I cannot wait to finish drawing her and completing the other two. As you may be able to see in the above picture I have drawn in the shadows and details that make a subject become more realistic. She pops out of the portrait!
I have a little tip, (for anyone who doesn't already know it)...when you are drawing, one of the best ways to see if there are any areas that need improvement in your drawing is to take a picture of it and look at it on your computer screen. I have no idea why it's so easy to see little areas to tweak, but it is. So looking at this picture of Sister #1 is driving me nuts! I didn't see those things before, but now I see what needs to be tweaked!
I have also started on Sister #2's hair. Hair can be very difficult and takes a lot of patience...especially if it is dark hair. (Layering color is the key). I still have plenty to do on her hair and then it is to the shadows of her face (my favorite).
Stay tuned!
Drawing Progress-Sweet Little Girls
Well, it's been a few weeks since I posted to this blog. I've been in an art show and sale (I'll blog about that later), and gotten several commissions. This blog is to update and show a progress of a drawing I'm doing for a client. She's having me draw a portrait of her boyfriend's girls.
Shhhh...it's a birthday surprise!
Here's a picture of the girls, all at the age of about 12 months old...at different times. I will call them baby one, two and three (from left to right).


Cute, huh? Well, I had a couple of things to work through. The client wants to have the girls on one portrait as if they had actually posed together. (I've done that many times for clients...so I didn't sweat it...) The girls all have the same beautiful smile, so that is working for me!
The sisters #1 and #2 are facing the same direction, though cropped differently. #3 sister is facing a different direction and holding a bear that covers her chin.
THE DRAWING SO FAR: (16x20 on Caslon /Artigan paper)

So here is the drawing so far and how I have dealt with any of the above listed dilemmas. (The warped appearance is because of my camera...The portrait is straight and not bowed. And there is light reflecting on their eyes slightly which may look strange)... I have drawn them in a triangle lay out.
I sized the portraits of each of the girls to be as similar as possible. (With the middle girl slightly larger to simulate her "sitting" closer to the viewer). I flipped the sister #3 so that they are all looking in the same direction. And I have not added the bear that #3 is holding, I think it will look much cleaner and less distracting with the bear not there.
The only detail I've done so far is the sister #1's dress and bow (bottom left corner). And I've drawn in each of their eyes. The eyes are the most important to a portrait to capture the subject's personality and looks. I've just begun and have a lot of tweaking to do. This is actually the ugliest part of a portrait and I cannot wait to get further!
Watch for more progress drawings in the next few days!
Shhhh...it's a birthday surprise!
Here's a picture of the girls, all at the age of about 12 months old...at different times. I will call them baby one, two and three (from left to right).


Cute, huh? Well, I had a couple of things to work through. The client wants to have the girls on one portrait as if they had actually posed together. (I've done that many times for clients...so I didn't sweat it...) The girls all have the same beautiful smile, so that is working for me!
The sisters #1 and #2 are facing the same direction, though cropped differently. #3 sister is facing a different direction and holding a bear that covers her chin.
THE DRAWING SO FAR: (16x20 on Caslon /Artigan paper)

I sized the portraits of each of the girls to be as similar as possible. (With the middle girl slightly larger to simulate her "sitting" closer to the viewer). I flipped the sister #3 so that they are all looking in the same direction. And I have not added the bear that #3 is holding, I think it will look much cleaner and less distracting with the bear not there.
The only detail I've done so far is the sister #1's dress and bow (bottom left corner). And I've drawn in each of their eyes. The eyes are the most important to a portrait to capture the subject's personality and looks. I've just begun and have a lot of tweaking to do. This is actually the ugliest part of a portrait and I cannot wait to get further!
Watch for more progress drawings in the next few days!


 Posts


