Sunshine the Dog...Final

Wow! The Holidays have been really busy this year! I had promised to show progress on each portrait, but I've been doing so much this year that I haven't gotten a chance to show you these last few portraits as they progress. But I thought I'd show you the end result of this one. It's a beautiful dog named "Sunshine".

It's another Christmas gift...so shhhh!

Sunshine is sitting in the "Sunshine"....heehee...so she appears to be a little lighter in color than she appears in some of the photos the client sent me. But I really love drawing pets and people sitting in the sunshine and in the grass. I hope the client loves it!

Merry Christmas to all!


Here's the portrait - 20"x24" Pastels/Tinted Charcoal on Mat Board
(colors may look different based on photo & quality of computer)


Close up of her face.


Original Photo

Drawing Progress - Horses - All done!

I'm done! The horses turned out pretty cool. I like them and hope that the person receiving it for Christmas is going to LOVE it! I never want to do anything else...I really enjoy this! All I have to do is spray it with a final fixative and deliver it!


Drawing Progress - Horses

I have been promising to update clients on my drawing progress...and I've let up a little...only because of the holidays and art shows. But, enough with the excuses...

When a client asked me to draw horses for her, (as a Christmas gift to her daughter...one horse has passed away and the other she has now...both very special to her), I was really thrilled. Horses are one of the most beautiful creatures that God ever designed. And drawing them is one of my favorite things to do.

As I began to draw the first horse, Ned, my intention was to use tinted charcoal. I love the look of it...it's very subtle. But I found that nothing but trouble was in store for me. The tinted charcoal only comes in wooden pencil form.  But because charcoal is so fragile and crumbly...well, as you can probably guess, each time I went to sharpen them the lead just busted up. The result was a red face and scowling eyes. (not the drawing...ME). As a result of this struggle I now own many different kinds of pencil sharpeners...electric, hand crank, little ones, big ones, expensive ones and cheap ones...so if you need to borrow one I'm your gal! I also tried my hand at whittling, which my brother taught me how to do one night sitting by a bon-fire...but, nope, that didn't work either!

I struggled for days...until I realized that the tinted charcoal was really similar to my pastels...which are not pencils, but the hard chalk type that can be sharpened by using sand paper. Or if you are blessed to have a relative in the dry-wall business he can hook you up with some dry-wall screen. I have a small square of it which I wrapped around the bottom part of a pastel box. I use the top of the box to hold it onto it. Then I can sharpen the pastels while the "dust" goes into the box. When I'm done I just turn the top back around to close the box until next time. (Just a little hint for you pastel artists and artists to be).


Okay, so I started using the pastels...and yay! I got my "art mojo" back. It's that thing that just comes over me and says...okay...yes...this is looking how I wanted. No more struggling. Whew! So I have the first horse done (mostly)...and then I have a second horse in a similar pose (jumping) for the other side of the page. I am going to tweek this first horse after I've started the other, but for the most part he's finished.

The picture that the client provided is very sharp and clear, but really small. So here's another tip...scan the picture and enlarge it. (You can't tell here, but the enlargement is blurry when it comes to details). So I bought a really great magnifying glass that hangs around my neck. When I want to see detail more easily I look at the original and it works nicely!

I will be drawing the other horse starting tomorrow...so check back again soon!!!


Pastels on a brown mat board 20"x24"

Drawing Progress-Sweet Little Girls - Final


I'm done! As you can see...I decided on keeping the bear in the Sister #3's portrait. She just looked lonely without it. Her dress did not work without the bear sitting in front of it either. Although I did draw it in as softly as I could so as to not take away from the adorable faces of the girls.

I hope that the client loves what I did. I enjoyed drawing these beautiful girls and hope to get many more clients who have other little ones for me to draw!

More portraits to come starting next week...Whew!!! I will actually be drawing horses! So check back after Thanksgiving! Happy Holidays!

Close Ups:

Drawing Progress-Sweet Little Girls - #3


Today I am posting #3 in the drawing progress I'm doing on the three sweet little sisters. I'm nearly done with the first sister and now the second. I have drawn in the shadows of her face to bring out it's shape and put detail into her clothes.

I will be tweaking her eyes to make them a little softer and softening the shadows in her face. she is drawn a little darker to bring her forward in the portrait. Doesn't it give the illusion of her sitting in front of her siblings?(Giving the portrait depth).

I will be finishing this portrait by the weekend. Hope you come back to see the final result!

(btw...please excuse the photography, I am having a little trouble with my camera...thanks!)

Drawing Progress-Sweet Little Girls - #2


Okay, so far I have nearly completed Sister #1. She is a beautiful little girl and bringing her face to life using my Derwent Colour Soft (Brown Earth) pencil was a blast. I cannot wait to finish drawing her and completing the other two. As you may be able to see in the above picture I have drawn in the shadows and details that make a subject become more realistic. She pops out of the portrait!

I have a little tip, (for anyone who doesn't already know it)...when you are drawing, one of the best ways to see if there are any areas that need improvement in your drawing is to take a picture of it and look at it on your computer screen. I have no idea why it's so easy to see little areas to tweak, but it is. So looking at this picture of Sister #1 is driving me nuts! I didn't see those things before, but now I see what needs to be tweaked!

I have also started on Sister #2's hair. Hair can be very difficult and takes a lot of patience...especially if it is dark hair. (Layering color is the key). I still have plenty to do on her hair and then it is to the shadows of her face (my favorite).

Stay tuned!

Drawing Progress-Sweet Little Girls

Well, it's been a few weeks since I posted to this blog. I've been in an art show and sale (I'll blog about that later), and gotten several commissions. This blog is to update and show a progress of a drawing I'm doing for a client. She's having me draw a portrait of her boyfriend's girls.

Shhhh...it's a birthday surprise!

Here's a picture of the girls, all at the age of about 12 months old...at different times. I will call them baby one, two and three (from left to right).


Cute, huh? Well, I had a couple of things to work through. The client wants to have the girls on one portrait as if they had actually posed together. (I've done that many times for clients...so I didn't sweat it...) The girls all have the same beautiful smile, so that is working for me!

The sisters #1 and #2 are facing the same direction, though cropped differently. #3 sister is facing a different direction and holding a bear that covers her chin.

THE DRAWING SO FAR: (16x20 on Caslon /Artigan paper)


So  here is the drawing so far and how I have dealt with any of the above listed dilemmas. (The warped appearance is because of my camera...The portrait is straight and not bowed. And there is light reflecting on their eyes slightly which may look strange)... I have drawn them in a triangle lay out.

I sized the portraits of each of the girls to be as similar as possible. (With the middle girl slightly larger to simulate her "sitting" closer to the viewer). I flipped the sister #3 so that they are all looking in the same direction. And I have not added the bear that #3 is holding, I think it will look much cleaner and less distracting with the bear not there.

The only detail I've done so far is the sister #1's dress and bow (bottom left corner). And I've drawn in each of their eyes. The eyes are the most important to a portrait to capture the subject's personality and looks. I've just begun and have a lot of tweaking to do. This is actually the ugliest part of a portrait and I cannot wait to get further!

Watch for more progress drawings in the next few days!

Graphite Pencil-vs-Charcoal


I love drawing...though I haven't drawn all my life, I feel like I have. The biggest problem is figuring out what I love drawing WITH the most. It's like a kid being let loose in FAO Schwartz to play with whatever she wants to. I love finding new things to draw with and figuring out how to use them. Though I use, and love, pastels and colored pencils, I'm only going to discuss graphite pencils and charcoal...their history and interesting tid-bits. Then I'll talk about my opinions and preferences...and I'd like to hear about yours.

GRAPHITE - The History & Other Interesting Tid-Bits

Did you know that the core of a pencil is not really lead, though we call it that? Lead was used in early styluses. The core of a pencil is actually made from nontoxic graphite. Graphite started being used following the discovery of a large graphite deposit in Borrowdale, England in 1564. Graphite left a darker mark than lead, but was so soft and brittle that it required a holder. At first, sticks of graphite were wrapped in string. Later, the graphite was inserted into wooden sticks that had been hollowed-out by hand! The wood-cased pencil was born.

Interesting tid-bit: The first mass produced pencils were not painted. They wanted to show off the wood casings, but soon they started painting the casings. And the reason that most hexagon shaped pencils are yellow is because in the 1800's the best graphite came from China and the color yellow represented a regal feeling associated with China.

You can now get artist graphite pencils in a full range of densities ranging from 9B (softest) to 9H (hardest)...with the softest making the darkest marks. You can also find it in large chucks for covering large areas.

CHARCOAL - The History and Other Interesting Tid-Bits


In early years charcoal was used as a preliminary tool to sketch quickly. It was much too easily smudged and was very messy, so it was normally painted over or drawn over with other media.

Charcoal can be obtained in sticks, pencils, chunks, vine and compressed charcoal. Most artists prefer vine or willow charcoal - which is made by burning wood into soft, medium and hard consistencies. It's easy to use and is versatile. Willow charcoal can come thin or very thick.Compressed charcoal is not as messy as the uncompressed vine and willow charcoal. It is made with charcoal powder mixed with gum binder compressed into round or square sticks. It comes in different hardnesses like graphite. You can also get charcoal in pencil form with a variety of hardnesses as well - better used with a thicker, sturdier paper. These can be bought individually or in sets.

The early origins of charcoal drawings can be found in France. Primitive drawings of bulls and horses that are believed to be drawn with branches and sticks burnt at the end lines the walls of a cave.

MY PREFERENCE

Graphite - The Pros and Cons

Bored yet?...Well...this is where I give my opinion...I like them both. However, I will try to give my opinion of the pros and cons of each.

* The Pros of Graphite: This was my first drawing tool...it usually is for most artists...Graphite has such a smooth even feeling and it is so much easier to get the detail desired in some works of art, especially portraits. I think graphite blends well. Whether using a blending stump or just using a gradation of hard to soft in order to blend, they can easily make your subject have a life-like or photo-like appearance. Pencils are also easy to hold and use without being messy. They are easily transportable and don't require much else when you want to head out to the park to draw or sketch.

* The Cons of Graphite: There aren't many to me. If using a kneaded eraser to pick out highlights, graphite is not as forgiving. If you make a mistake or get pencil marks on your paper where you didn't intend to, it can be difficult to erase it. And one other thing that I'm not as crazy about is that it's hard to get dark areas as dark as I want without becoming shiny.

Charcoal - The Pros and Cons

* The Pros of Charcoal: I love the "feeling" I get when using charcoal. It's goes onto the paper so easily that you feel you can freely swipe your paper and draw the world! (Boy, did that sound corny?) I like the vine and willow form of charcoal, personally. You can use your sanding block to make it nice and sharp or use the side for a broader stroke. It's really easy to manipulate. And one of my most favorite things about charcoal is the darkness you can achieve with it. When I want a dark black, it obliges me without becoming shiny like graphite.

* The Cons of Charcoal: Charcoal is very sensitive. When I'm drawing with graphite I can easily work without worrying about smudging my work. My hand can rest about anywhere on the paper, if I'm careful. However, Charcoal isn't as forgiving. I feel that my hand is doing acrobatics to keep from smudging anything. Almost like "Twister for fingers". And I'm always worried about my 10 year old getting too close to my artwork and brushing against it or touching it.

IN CONCLUSION

In the end, I really enjoy both of these tools when drawing. They are so different and are both fun to work with. I think determining which one I want to work with has to do with either my mood or the subject that I'm drawing. (And sometimes the size of the artwork. - because graphite is easier to get detail done and charcoal is best with larger and free flowing work).

Have you tried both mediums? Which do you prefer? And Why?

A New Contest


Find out how you can win a free portrait from your photo! Many ways to enter! Follow this blog and comment on one of my posts...and go to the Housework Haters Club to find several more ways to enter!

Thank you!!!!

Our Need For Beauty


Sitting at home one Sunday afternoon with my husband and son, I suddenly realized what kind of day it was turning out to be. We were all cranky and stressed. Nothing seemed right. I was boiling on the inside...stressing of budgets, the cleanliness of the house, the dog chewing up everything in sight...it was all too much for me.

We decided at a moment's notice to go to the Smokey Mountains...about a 40 minute drive for us. After arriving we drove around the 11 mile loop of Cades Cove. It was a gorgeous day. The temperature was perfect...not too hot and not too cool. We rolled down the windows and had our trigger-finger on the camera at all times!


Why did we do this? Why did we suddenly feel stress roll off of us as if we were the richest, cleanest, dogless people in the world? This is my theory...WE NEED BEAUTY. God loves beautiful things and made us to love it as well. Why else would he stress that we think about beautiful things? Philippians 4:8 says "Finally, brethren, whatsoever things are true, whatsoever things are honest, whatsoever things are just, whatsoever things are pure, whatsoever things are lovely, whatsoever things are of good report; if there be any virtue, and if there be any praise, think on these things."

Our creator made us to desire lovely things. He wants us to think about them. I don't think that we are suppose to ignore the unlovely things in life, but we aren't suppose to dwell on them long and hard either. Why? We just weren't created to. The cares of life should be rolled over into His more-than capable hands...and we are just to think about things that are honest, pure and lovely...in other words, TRUST HIM


God created such a beautiful earth...every part of the world has it's beauty and how many times have you heard someone say, "This looks like a painting", when they see lovely scenery? I've often wondered, and have heard others ask, what is art good for? Most of it is not useful, not needed for anything...yet people...many people...love art. I know that I have been known to swoon over a beautiful landscape or still life in my time. Why? Because beauty relieves stress and gives us joy. And, I truly believe it gives God joy too. Enjoy what you see and think about it. Dwell on it and most of all be thankful for it. Take a drive and notice a beautiful tree, or landscape. Or go to an art gallery and stare at beauty. We need it...at least I do. So next time you get overwhelmed by daily stresses just try saying, "Renoir, take me away!"

09-09-09 Twitterthon

Please check out the 09-09-09 Twitterthon happening TODAY...a wonderful cause to help stop child trafficking. There are great give-a-ways to anyone chipping in $9 or more!

Here is what's happening there now:

All funds go to The Born2Fly Project to stop child trafficking. Watch this space for updates all day long including prize give-aways and winners. Remember the total on the Chip-in button at the top right does not include donations made by check. I'll update the total throughout the day. All update times are EDT (US).

My Story - How I Became an Artist

How God Made ART Blossom Out of a Dry Flower Pot:

I grew up in a family of four children. My twin brother and I were the oldest...then came two more brothers. Yes...I was sister-less. But that was okay. I held my own with my brothers and I had a pretty happy tom-boyish childhood.

While growing up I never considered myself artistic...never even imagined I could be. I enjoyed art class in school, but no one ever mentioned any particular talent. As a matter of fact, my entire self-esteem was not what you would call "great". All that changed when I met my husband. He was the most encouraging person I'd ever met. He would compliment everything I did and would tell me that he saw something in me, a potential. He saw that I had something inside that wanted to emerge. Neither he or I knew what that could be...and I wouldn't find out until my mid-30's that I was destined to be an artist!

It all started so subtly. I had been working in my church in Longwood, Florida. The pastor at that church, and his wife, are both very talented artists. He wanted the church bulletins to be original, not those ready made kind you buy at the bookstore. So I learned a computer drawing program and started designing them. I had such great feedback from people who were telling me that the bulletins were so special to them. Some even told me that they were framing them.

Then the craziest thing happened...my pastor started telling me that I was an artist...Huh?...I laughed it off, embarrassed that he would think I was an artist. But, he continued to call me one. With all that encouragement from my husband, people at the church and my pastor I even started believing it...(God bless you, Pastor Greg Freeman!!!)

A few years later my husband and I had been married for 12 years and had adopted a baby two years earlier. We felt called to work as house parents at a childrens home in Okeechobee, Florida, and ran one of the homes (with 6 girls). It was the most challenging time of our lives to date. But I have found that the most challenging and difficult times causes things inside of us, either good or bad, to bubble up to the surface. One day, while standing out by the water with one of the girls in our home,  I commented that I wish I could draw or paint what I was seeing because the scenery was really beautiful. She turned to me and simply said, "Why don't you?" I answered her the way most people answer something like that..."I can't even draw stick figures!" But her simple answer sparked something in my head. I started thinking about Pastor Greg calling me an artist so I went inside, sat down at the kitchen table and started drawing something. It wasn't great, but I was pleasantly surprised at how bad is wasn't. So, I drew something again the next day and the next...and the next. I found that I couldn't stop. I bought books, I went to classes, and drew everything I saw.

I started seeing the entire world differently. A tree wasn't just a tree...it was a beautiful object of shapes, highlights and shadows. At that point nothing was safe from my pencil! I drew everything and carried my sketchbook everywhere I went! In time I found that my strength was portraits. I loved drawing faces, people, dogs, cats, cows...you name it!  Now I draw portraits from photos by commission and I absolutely love it!

A few months ago I was laid off from my 8-5 job. It's been a strain on us financially, but I have also seen it as a blessing from the Lord. I am giving it a go and doing what I love most...drawing. I've started drawing commissions full time. (And marketing myself). I don't believe that God allows a talent to emerge from nothing for no reason. I've spent the last 8 or 9 years practicing, practicing, practicing and have gotten better every year. I have so much more in me and I'm excited about what's coming next. Even if I don't know what that is!
But one thing I have learned is that God can make a blossom grow from a dry pot...like me...He's got some more planting and growing to do in me...and I am ready! 

Thank you for reading this blog. I'm still very new at it, and I'm not really a writer...hmmm...maybe I shouldn't say that either...you never know!!!!

Melinda

The "Un-Art Festival"

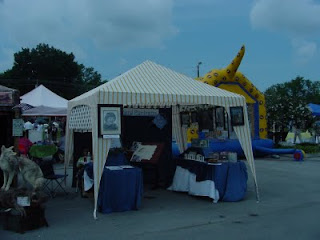
Hi! I thought I would drop you a few notes and pics about the "arts and crafts" festival I attended this past weekend. I call it the "Un-Art festival" because that's not really what it was. There were some arts and crafts vendors there...but there was also bluegrass music, antique car competitions, an antique appraiser, a mechanical bull and other interesting non-artsy things.

This was my very first booth at any event. The other arts and crafts vendors were so nice. I loved meeting them and learning from them. But none of us, new or seasoned veterans, sold a thing! It was quite disappointing, but I learned alot, got to know some great people, and had a real adventure. So, I wouldn't have changed anything! (Well, maybe the no selling part)...

Here are a few pictures of my first booth...I would love any helpful hints, advice, or constructive critism you may be able to share! Thanks!

Cigar Box Purse w/ a Custom Portrait!

 
I enjoyed this project so much. This photo is my favorite photo in the world! It's my son. He's very special to my husband and I. For 10 years we tried and prayed to have a baby...and this sounds strange, but, I'm glad we never did. If we had we would have never adopted this awesome, talented, intelligent young man. (He was a baby, straight from the hospital when we adopted him). 
    A friend of mine and I took our children to JC Pennys to get photos done (he was six months old...and just started sitting up good on his own.) He adored Elmo back then and used to sit in a large laundry basket watching MoMo as he used to call him!
        • You can see the progression of the portrait at http://melsartdiner.blogspot.com/2009/08/little-portrait-progression.html
        • I have decoupaged it (Mod Podge of course)...with beautiful green paper, stickers, rub-ons, buttons and other assorted goodies onto a wooden cigar box.
        • First I decoupaged a couple of gorgeous scrapbook papers onto it with mat Mod Podge and finished it off with gloss Mod Podge using artistic brush strokes to make it "painterly"
        • After I finished putting all that I wanted on the cigar box, (including the portrait - which had been sprayed several times with a fixative), and when the Mod Podge was dry I applied a clear varnish to take away tackiness and protect it!
        • I used very nice glass and metal jewelry beads with a sturdy wax covered string for the handle. And finished the purse by padding the inside with batting and covered with a black and white gingham fabric. I also added some stretchy elastic ribbon for holding valuables... and a mirror... inside the purse.
        • Hope you enjoy seeing this little project!
        • You can see a more detailed step by step blog of the making of a cigar box purse at: http://melsartdiner.blogspot.com/2009/08/blue-beaded-cigar-box-purse.html
        • Get your own custom box with a portrait at www.melhowardportraits.etsy.com

        Win a FREE PORTRAIT!

        (2 ways to enter & win)
        Free portrait #1
        1. FOLLOW this blog
        2. LEAVE A COMMENT at the end of this post
        Win a free charcoal portrait (drawn from your photo)
        • Size...9x12
        • One subject (person or pet)
        • On archival quality paper - white or cream
        • Including a black mat (ready for framing)
        • Takes 2-3 weeks to complete after contest is over (depending on my workload)
        • $175.00 Value!!!
        (See examples at my website, www.melindahowardportraits.com or my Etsy store, www.melhowardportraits.etsy.com)

        Here's the rules...
        • Contest ends on Labor Day, September 6th
        • Check back on September 7th to see if you won
        • Winner will be chosen randomly, with an impartial witness
        • Winner must contact me within a week or a new winner will be chosen
        • The winner will email a photo to be drawn. (It will take 2-3 weeks to complete)
        • Shipping is free for U.S. address only, if outside the U.S. There will be a shipping cost.

        Free Portrait #2 -

        • Details on how to win by donating $9 to help stop child trafficking...It's called 09-09-09. See the blog link for Diana Scimone or click below for details:

        A Little Portrait Progression - No. 3


        I am about 90% done with this portrait. It looks 100% done, but there are small things that need to be tweeked.

        I like to step away from the drawing for a day or so at this point. Then I look at it upside down, sideways, as a picture on my computer screen, etc. It is good to look at angles that I haven't looked at before. When drawing it sometimes I don't see everything so clearly because I've been staring at it so long. When I step away for a time and then look again I see things I missed.

        When I feel I'm 100% done I'll post the finished work! Thanks for looking!!!

        A Little Portrait Progression - No. 2


        Here is the next progression of the little baby portrait. As you see I have added some shading to his face, (still working from the left), and added more sketching to his clothes. I have filled in his eyes and I am happy with his right eye (the one on the left of the portrait). But I am still tweeking and working on his other eye.

        When I finish that I will continue to work to the right and down...so his nose and left cheek will be next and then his mouth and shading on his chin. When I'm completely happy with his face I will start working on Elmo and then the baby's clothes.

        I hope you are enjoying watching this cute little portrait come to life! Check back soon for more!!!

        A Little Portrait Progression

        Good Friday all! I am working on a small charcoal drawing to place on a cigar box purse. It's a really cute baby ...along with a friend. I thought I'd show a progression of the drawing and the cigar box purse.

        This is "day one"...I've laid out the most of the drawing in a preliminary sketch and have nearly finished the hat. When working with charcoal I always work from the top-left and work my way down and right...because it is so easily smudged.

        I enjoy this part...watching it start to come together and come to life! I still have plenty of tweeking to do to his face...especially his mouth, which I am not quite happy with. I want it to represent faithfully the sweetness of his little smile...with just a hint of nervousness - which is so precious.

        Here is the start:


        Here is the reference photo:


        Don't forget to "follow" this blog to watch the progression of this drawing and other drawings to come!!!

        HOW TO MAKE A CIGAR BOX PURSE


        STEPS TO CREATING A RE-PURPOSED WOODEN CIGAR BOX PURSE
        Here I am...finally posting another blog. This time I wanted to show how I decoupage and create a cigar box purse. This one ended up being pretty cute. Not a lot went on it...except for time...and beads...you know the old saying...Sometimes less is more. I enjoyed making this one and now I'm enjoying showing you how I did it!


        Step One:
        Finding the right cigar box. I liked this one because it was small. Just the right size for a sweet little purse.

        By the way...I find my cigar boxes at a tobacco store here in town. Every tobacco / cigar store has different policies about their extra boxes...some don't sell them at all...some sell them according to how "nice" they are, from $1 to $10 each. I happened to find just the right guy who was selling all of his at the same price, no matter what the style. At first he was selling them for $3 each. But then changed his prices to $2 each!!! I think that's a great deal. I'm very picky about which ones I buy. Only the nicest, heartiest, strongest boxes.


        Okay....

        Step 2:
        Peeling off the annoying stickers. (I don't worry about the ones on the inside. They are covered by batting and fabric most of the time). I use Goof-Off to get the stubborn ones to obey...boy...it's strong stuff...so use sparingly!


        Step 3:
        Sanding the cigar box where I want to add paint or decoupage something to it. I use fine sand paper. It doesn't take a lot of sanding...just enough to get the varnish roughed up to take the paint or Mod Podge.


        Step 4:
        Removing the clasp. There are some cigar boxes that have cute easy clasps that I keep...but for most of them I replace them with a nicer clasp. I like the swing clasps the most. They are easy to use, are screwed in so they will last, and just look a lot nicer.


        And...
        Putting on the new one...hint...I attach both parts first with hot glue. That way, when you start to drill in the screw your clasp won't turn and end up being crooked. Most of the time I center it to the box using the same holes that the old clasp used to occupy!


        Step 5:
        Cutting out paper. I use an exact-o knife to cut out paper that I want to use on the box. I measure the area first. Some boxes may not be exact. So some extra trimming may have to be done.


        Step 6:
        Decoupaging the paper to the box with Mod Podge. Hint: If the paper is thin spray it with acrylic sealer and let it dry (to help keep it from bubbling when applied)...also, it is best to apply the Mod Podge to the back of the paper and the box. After putting the paper on, let it dry for a few minutes and then apply the Mod Podge over the paper again. (unless you have other elements to add first).


        Step 7:
        Painting the sides (Of course, this step changes from purse to purse) For this one I wanted to keep some of the wood exposed because it was a lovely color...but I felt that a little bit of blue would work nicely on this one...and my fingers! (I use crafter's acrylic paint).


        Step 8:
        Putting on the "blingage"...I wanted this cigar box purse to be sparkly and fun. So I applied rinestones in different sizes and shades of blue to the center of some of the flowers. This step takes time and patience...and fingernails help a little!


        Step 9:
        More "blingage"...next I added beaded fringe (actually this pretty blue fringe was the inspiration for this particular cigar box purse). Because it was so long and the box so small I added it to the lid of the box. (after adding glass feet to the purse it was just the right length). Most of the time I would have put the fringe on the bottom part of the box so that it would not interfere when closing the purse...but in this case I think it's so cute that I don't mind it.


        Step 10:
        Drilling the holes for the handles. I use a small bit and carefully drill holes about 1/2" to 1" from each side and in the middle from front to back. This takes careful consideration so that you don't accidentally make your handle crooked. (remember to measure twice and drill once...or your purse is ruined)...yep...happened to me!


        Step 11:
        Adding the handle. Here I'm different than most who make these cigar box purses. I don't like the rigid round bamboo handles that most cigar box purses have. I use jewelry beads to make flexible individualized handles. Most of the time the handle determines the style of purse I decide to make. I use either black waxed cord (if the beads are not see-through or clear beading string... to put the beads together (fishing line works good too - nice and strong).


        Step 12:
        The inside of the purse. Hint...these boxes may not stink to some...but to me...peee-uuuu...so I hide a good smelling dryer sheet under the batting and fabric. And before you know it no more stinky!!! I hot glue down the batting at the edges


        Step 13:
        Adding the fabric. I love choosing the fabric for the inside of the purse. I sometimes add ribbon and buttons as well to hold cell phones and lip stick in place. (although I didn't in this purse). For this fun little purse I used a bandana. What I like about bandanas...besides the good price (less than $2), is that the inside is usually less detailed than the border...so you can use that for the top and the border for the bottom of the purse...coordinated yet different!


        Step 14:
        Adding the mirror: Here I find the center of the top...make a hole in the fabric and batting...put a large bead of hot glue to the wood and attach the mirror...pressing down firmly.


        All Done!!!!
        After touching up any paint oops, pulling off the hot glue strings and wiping with a dry cloth I spray the purse with acrylic sealer and taahhh daahhh! A re-purposed cigar box...nice and shiny and ready for use!!!